Pedal Tone for Neoclassical Shred and Beyond


pedal tone shred neoclassical
Combining the old and new

Greetings fellow Shred guitarist! Today I want to give you a brief history of the pedal tone and how it came to be a staple in neoclassical shred guitar.

So what exactly is a pedal tone? Simply put, it is a note that is continuously returned to that acts as a foundation or “pedal” for the rest of the musical piece. When changing notes of a melody or changing the harmony, the pedal tone’s harmonic context changes leading to a powerful and dramatic sound.

But before we dive into the world of neoclassical shred, let’s start at the beginning.

Why is it called a pedal tone?

The pedal tone is a technique that has been used in music for centuries, dating back to the Baroque period where it was first utilized on organs.

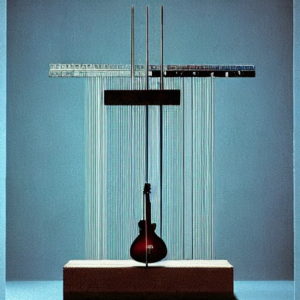
You see, on a pipe organ, the pedals allow the organist to sustain a bass note by activating a mechanism that keeps the valves open, allowing air to continue flowing through the pipes. Because of the pneumatic mechanism of the old pipe organs, only one pedal bass note could be played at a time and, if you held one down with one foot and played other notes with the other foot, every time you changed notes, the lowest or highest pitch (depending on the organ) held down will sound in between the other notes. 

pedal tone as a technique for guitar


Click the pic for a great resource on Neoclassical techniques

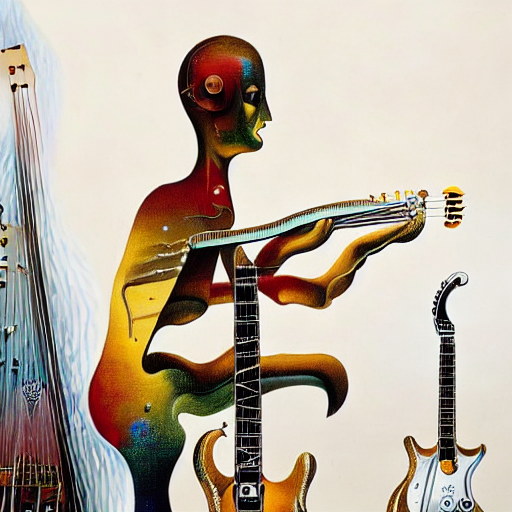
The sound of going back to a single note in between all the notes of a melody or passage was eventually adopted by guitar players who used a variety of methods to achieve a similar effect.


pedal tone example tab
Example of a pedal tone lick that is reminiscent of Bach. This uses a high pedal tone.

pedal tone neoclassical organ meets shred guitar


In shred guitar, the pedal tone is often used to create a sense of intensity and drama, and can be achieved by using a variety of techniques such as legato, alternate picking or two hand tapping.

Now, let’s talk about neoclassical shred guitar. This style of playing, which emerged in the 1980s, combines elements of classical music with the speed and technicality of traditional shred guitar. And where would neoclassical shred be without the pedal tone? This technique is an integral part of the genre, and is used to create intricate and complex melodies that showcase the player’s skill and musicianship.


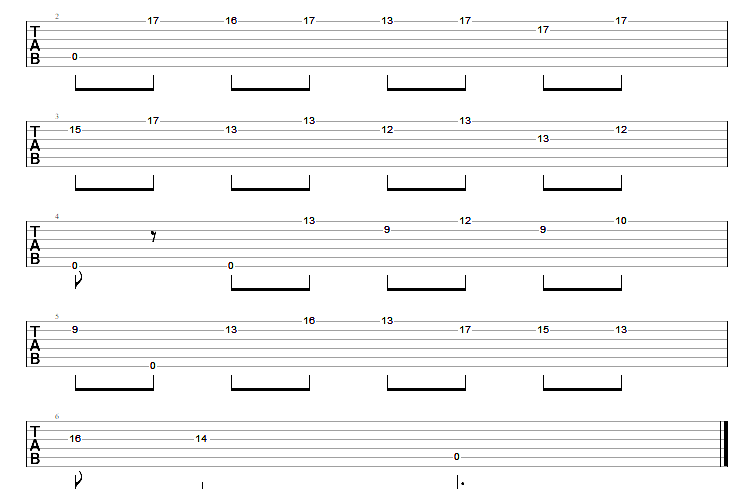
Morgan Wick from Guitar Control demonstrating a killer neoclassical arpeggio sequence using pedal tones


diverse application of the pedal tone


But the pedal tone isn’t just for neoclassical shred guitarists – it can be used in a variety of genres and styles. From rock to jazz to blues, the pedal tone is a versatile and essential technique for any guitar player.

So there you have it – the history and significance of the pedal tone in music, and particularly in the world of shred guitar. I hope you’ve enjoyed this little lesson, and that you’ll consider incorporating the pedal tone into your own playing.

Shred on!

-Anton Anton


Some of the Best Metal Guitars under $500 available right now

best metal guitars under $500

Greetings, fellow Shredder! It’s your old pal Anton here, and today I want to show you some of the great options that have become available for buying pro level shred guitars on a budget. So let’s go over some of, what I consider to be, the best metal guitars under $500.

But first, let’s take a look at why some of these great budget options exist and why it might be better to consider buying a budget guitar than saving your money for guitar that would cost you the same money as a used car.

The current state of guitar brands and pricesbest metal guitars under $500 shred guitars on a budget

The guitar industry has changed significantly over the years, with a shift towards cheaper, outsourced manufacturing labor. While this has opened some opportunities for budget-conscious guitarists, many companies still charge high prices for guitars made with cheap labor.

A number of classic brands have been acquired by conglomerates who prioritize profits over customer satisfaction, joining the modern trend of sacrificing long-term success to meet quarterly projections.

For the prices charged by some of these companies for lower quality mimics of classic guitars, you could have a custom guitar made to your exact specifications.

The silver lining

pro level shred guitars for cheap best metal guitars under $500

But it’s not all bad news. Many of the factories that produce these lower-priced guitars have been in the game for a long time and have honed their craft to the point where they can now produce some extremely high-quality and reliable guitars. And let’s not forget about all the smaller guitar companies out there who have been offering these same high-quality guitars for much cheaper than the more famous brands.

In fact, you’ll likely be surprised at what can be found among the best metal guitars under $500.

So if you’re in the market for a new Shred guitar, don’t just blindly throw your money at the first big-name brand you see. Do your research and consider all your options. You’ll be amazed at just how many hidden gems are out there that have been made with care and attention and made available at a fraction of the price.


The Best Metal Guitars Under $500


The Jackson JS32T Rhoads V – under $400 pro quality shredder

Jackson JS32T Rhoads V for less than $400


For those who may not be familiar, Jackson is a company that rose to prominence in the early 80’s in the Metal scene, first with the legendary Randy Rhoads and his Jackson Sandoval V guitar. To give an idea of how Jackson and Randy Rhoads cemented themselves into Heavy Metal history, the Sandoval V has been renamed the Rhoads V and has became a staple guitar in the world of Metal ever since.

Back in Metal’s original glory days, Jackson guitars were known for their high-quality instruments, particularly their fast and comfortable necks. And while they have always been a respected brand, I have to admit that I was a bit skeptical when I heard that they were now producing guitars in China.

But boy howdy, I was never so glad to be proven wrong.

The Jackson JS32T Kelly – Ferrari Red

Jackson’s JS32 Series – I can’t believe it’s not made in USA

These Chinese-made Jacksons are truly something special. The necks on these guitars are as smooth and fast as any I’ve ever played, and the overall quality of the instruments is top-notch. It’s clear that the team at Jackson is taking their craft seriously and putting in the time and effort to ensure that their Chinese-made guitars are just as good as their American-made counterparts.

It’s clear with Jackson’s JS32 series that Jackson has done something that few famous guitar brands are willing to do: they found a way to take advantage of modern technology to build incredibly quality guitars for cheap and then pass the savings onto the customer.


Excellent Review/Demo on entry level Jackson JS32 Kelly from GuitarMAX

More from Jackson’s JS32 Series

The Jackson JS32T Warrior – Natural Oil
The Jackson JS32T Kelly – Satin Black

As you can see, you don’t have to break the bank on some overpriced guitar. Shred for less with the best metal guitars under $500. 

While today we just went over the Jackson JS32 series of guitars, there are a lot of other options out there to get high quality Shred guitars for cheap. There are even a lot of new brands out there that offer alternatives to the classic names and are real competitors both in quality and price point. 

Be sure to check back frequently, as I’ll be covering many more excellent low-priced Shred guitars in the future and even doing some reviews.

Shred on!

-AntonAnton


Neoclassical guitar and the harmonic minor scale


neoclassical guitar harmonic minor scale automaton
Physical manifestation of the harmonic minor scale, seen here expressing itself as a neoclassical guitar solo


Greetings, my fine Neoclassical fan! If you’d like to enter the world of Neoclassical guitar, then I can help. Let’s dive into the world of the harmonic minor scale.

neoclassical guitar shred harmonic minor
harmonic minor dreaming of a metronome

Now, I know what you’re thinking – another scale to learn? Trust me, my friend, it’s worth it. The harmonic minor scale is a staple of neoclassical guitar and will add a whole new level of depth and complexity to your playing.

So, what exactly is the harmonic minor scale? Simply put, it’s a variation of the natural minor scale that raises the seventh degree by a half step. This creates a unique sound that is perfect for adding some drama and intensity to your playing.

The Harmonic Minor Scale

But how do you play it? It’s actually quite simple. To form a harmonic minor scale, all you have to do is start on the root note, then play the following pattern of whole and half steps: whole, half, whole, whole, half, whole and a half, half.

Now, I know that may sound a bit confusing, so let’s break it down with an example. Let’s say we’re playing in the key of A harmonic minor. We would start on the root note of A, then play B, C, D, E, F, G#, and finally A again. See? It’s not so hard after all.


Here’s a great resource to get you started on the 3 most important “scales” for Neoclassical guitar:


So, now that you know how to play the harmonic minor scale, it’s time to put it into action. Try incorporating it into your solos and see how it enhances your neoclassical playing. And don’t be afraid to experiment with different keys and modes – the harmonic minor scale is extremely versatile and can be used in a variety of musical situations.

Neoclassical guitar pattern in A harmonic minor

I put together the following simple Neoclassical pattern for you to try in A harmonic minor.

Note that G# is found in this pattern on the 16th fret of the 1st string, the 13th fret of the 3rd string and the 9th fret of the 2nd string.

It uses a few pedal tones to really drive the Neoclassical sound home.

neoclassical guitar pattern in A harmonic minor

If you’re a more advanced player and you’re looking to add some killer Neoclassical licks into your shredding, I’d personally recommend checking out Dan Mumm’s Neoclassical Shred concepts digital tab book.


Video of Dan Mumm demonstrating some of the Neoclassical licks from Neoclassical Shred Concepts

Neoclassical guitar harmonic minor pedal tone tab

So there you have it, my friends – a simple guide to get you started with the harmonic minor scale for Neoclassical guitar.

Use some of your staple Shred techniques such as alternate picking, two hand tapping, sweep picking and so on, mix it with plenty of practice and you’ve got a recipe for Neoclassical virtuosity.

Shred on!

-Anton Anton

3 Easy and Unique Sweep Picking Patterns for your Sweep Arsenal


sweep picking patterns
Unique sweep picking patterns for unique guitarists
sweep picking patterns for shred guitar
Mute those unused strings!

Hello my fellow Shredder! If you’re looking to learn some new and unique sweep picking patterns or simply take your sweep skills to the next level, you’ve come to the right place. I’ve got a few unique sweep picking patterns for you to try that I came up with a couple years ago to help me master the technique.

These proved very effective for me and I like how they sound so much, I still use them pretty regularly to this day.

Sweep picking can be a challenging technique to master, but with practice and dedication, you’ll be shredding like a pro in no time. In this article, we’ll go over some advanced patterns and exercises to help you improve your sweep picking skills.

But before we dive into the nitty gritty, let’s go over a quick refresher on sweep picking (you can find my sweep picking tips post here).

Sweep picking involves using either an up or down picking motion to play notes on a series of different adjacent strings (lending itself very well to playing arpeggios), with a smooth, sweeping motion. 

You can think of it as being similar to strumming chords, except the “strum” motion is replaced by a more precise down or upward picking motion that allows each string to ring out individually.

The importance of muting strings

Before you play through the sweep picking patterns that I’ve put together for you, there’s one more things you need to know.

To get a clean sweep, you have to avoid having more than one note ring out at the same time, such as in a chord. This can be achieved by only having one finger down at a time with a fretting hand and/or using your palm or other fingers to mute the strings that aren’t being played.

Ever seen a Shred virtuoso with something wrapped around the neck of their guitar near the nut or first fret? That’s a little device known as a string dampener, string mute or fret wrap. A string dampening device like these can mute or muffle the open strings to allow for a much more clear result when using techniques such as sweep picking or 2 hand tapping. 

Here is one of the most popular modern string dampening devices, the fret wrap:

Sweep Picking Pattern #1: D7 Arpeggio

This D7 arpeggio starts on the 10th fret of the 6th string and uses the legato techniques of hammer-ons, a slide, and a pull-off to add some extra flair. Check out the tab:

Sweep picking patterns D7
D7 intermediate sweep picking pattern by yours truly

Sweep Picking Pattern #2: Em7add2 Arpeggio

This Em7add2 arpeggio starts on the 5th string and uses hammer-ons and pull-offs to add some extra flavor. Don’t worry about the complex name of the arpeggio. Just try it out slowly and work it out note for note. Here it is:

sweep picking patterns Em7add2
Em7add2 sweep picking pattern from me to you

Sweep Picking Pattern #3: A Sus2/4 to A#11 Arpeggio

This A Sus2/4 to A#11 arpeggio starts on the 5th fret of the 6th string and, as the name suggests, switches from one arpeggio type to another. Again, don’t get hung up on the name. A more complicated name doesn’t mean that it’s more difficult to learn. Practice slowly before attempting to play it fast. Here are the tabs:

sweep picking patterns ASus2-4 to ASharp11
ASus2-4 to ASharp11 sweep picking pattern, by your pal, Anton

How I “mastered” sweep picking and learned to make my own Sweep Picking

Patterns

I remember when I first set out to master the art of sweep picking. It was a daunting task, to say the least. But, as with all things, a little bit of guidance can go a long way. That’s where Dan Mumm’s “Sweep Picking Mastery” course came in.


I first became enamored with sweep picking after watching one of Mumm’s videos for his song “A Glimpse Beyond.” The tapping parts were manageable, but the sweep arpeggios seemed impossible. Even on the slow sequenced part, I couldn’t wrap my head around how Mumm was able to play it so fast and cleanly. And the thought of memorizing so many different sweep picking patterns seemed like an insurmountable task.

  Dan Mumm's Instrumental Masterpiece "A Glimpse Beyond" (updated mix version which sounds so much better than the original)

But after working through Sweep Picking Mastery, everything started to click. It taught me how to start small and work your way up to more complex patterns, and it simplifies the process of learning advanced sweep patterns by learning how to think of them in smaller and more basic parts. I learned how those smaller and more basic arpeggio shapes repeat across the fretboard, which allowed me to learn and created my own more complex patterns much more easily.

Breaking down and expanding sweep picking patterns

sweep picking patterns from a neoclassical shred guitar master
A Neoclassical Shred Guitarist


Even if you haven’t worked through Sweep Picking Mastery, you can benefit from these same ideas by changing how you look at sweep patterns.

Pay attention to how certain sweep patterns are similar to others and try simplifying them first to playing just the first, last or middle 2 strings as a 2 string sweep pattern, 3 strings as a 3 string sweep pattern and so on before adding each additional string. 

Once you have that down, you can start expanding on them by adding additional hammer-ons, pull-offs or tapped notes either to extend the range or add other intervals to create more complex arpeggios. It sounds complicated when I try to explain it, but it’s actually really simple when you understand it.

The three patterns included as tabs in this article were developed thanks to my studies in “Sweep Picking Mastery.” It’s essentially a formula for building new patterns.

And while Mumm’s “The Sweep Picking Compendium” tab book includes hundreds of sweep arpeggio patterns, I found that “Sweep Picking Mastery” gave me everything I needed to know (although I’m sure the compendium is great and I’m sorry Dan if you ever read this!). 

And there you have it! Three intermediate level sweep picking patterns to add to your arsenal and hopefully some useful insight into how I learned to sweep pick and to make my own sweep picking patterns.

Remember, practice makes perfect, so don’t get discouraged if you struggle at first. With dedication and hard work, you’ll be sweep picking like a pro in no time.

Shred on!

-Anton Anton


String Dampener for guitar: why should you use one?

string dampener spirit in the old days
spirit of a string dampener behind the scenes

Greetings, fellow Shred fans! You may have noticed that a lot of today’s top guitarists use some kind of string dampener to improve clarity and enhance the sound of their instrument. These devices work by reducing the amount of vibration and noise that is produced by the strings, which can help to reduce or eliminate unwanted string noise and give the guitar a more focused and precise sound.

They are especially useful when using advanced techniques such as sweep picking and two hand tapping.

Benefits of using a string dampener

string dampener attempts of the ancient world
People have tried everything to dampen their strings over the years


If you’re working on some of these advanced techniques, you’ve probably wondered how your favorite players are able to get such a clean sound. While the Shred Masters have usually developed habits of muting unused strings with parts of either of their hands, a string dampener or fret wrap is often used in addition to this type of muting.

It gives a shredder a lot more control over their sound and helps ensure that their lightning fast licks can be heard distinctly without being drowned out in a mess of string vibrations and noise.

There are several options available on the market for dampening the strings, even an amazing invention by one of my top favorite shredders of all time, the legendary Michael Angelo Batio

If we’re talking about sheer popularity, however, the clear winner goes to the Fretwrap. Let’s take a quick look at both of these amazing inventions that have helped bring clarity to thousands of shred guitarists advanced techniques.


Fretwrap String Dampener


The Fretwrap by Gruvgear is a professional string dampener and muting accessory that is ideal for use in recording studios, live performances, and other creative situations where you want to eliminate overtones and sympathetic resonance.

It is an adjustable strap made of thick fabric and hook and loop material that fits over the headstock of the guitar and can be fine-tuned to provide the desired level of pressure and dampening on the strings.

The Fretwrap is quick and easy to use, and does not require any special modification, installation, or tools for your guitar. It is effective at cutting unwanted string noise and ringing, and is especially useful for two-hand tapping techniques. It’s easy to slide behind the nut of the guitar when you need to go back to using your open strings and then slide it back over the 1st or 2nd fret when you’re going back to a section using extreme finger tapping or sweep picking techniques.

The Fretwrap comes in a variety of color schemes and four different sizes to fit a range of guitar and bass guitar types. It is a must-have accessory for any studio, session player, or tapping aficionado.

Demo of the Fretwrap by Brandon Baker


Michael Angelo Batio’s Chromacast


string dampener 3rd hand
The envisioned “3rd hand.” Don’t try this at home, kids.

This sleek and stylish string dampener was designed by the legendary shredder himself and is perfect for those who want to add a touch of rockstar flair to their setup. 


It’s easy to apply and helps to reduce excess vibrations, giving you a more controlled and focused sound.

MAB describes his Chromacast string dampener as being designed to function as a “third hand” when playing the guitar, eliminating extraneous or unwanted string noise and feedback, and helping to “clean up” the sound of the instrument. It is completely adjustable and can be moved out of the way when not in use. Overall, the Chromacast string dampener is an innovative and effective tool that is easy to use and looks great.

The man himself, demonstrating some face melting alternate picking using the Chromacast

A demo video of the Chromacast by a very young GuitarMAX in his early days

So there you have it, folks – the top 2 options for string dampening and fret wrapping. Whether you’re a seasoned shredder or just starting out, these tools can help you take your sound to the next level and help you achieve the same clarity with advanced techniques that you’ve come to expect from your favorite players.

Shred on!

-AntonAnton


Neoclassical Shred Guitar: The Old Meets The New

neoclassical shred guitar
the old meeting the new

Neoclassical shred guitar is a fusion of classical and shred styles. It combines the technical precision and virtuosity of classical guitar with the high-energy, fast-paced style of shred guitar. It’s a unique and exciting blend of old and new, and it has cemented itself as one of the most important playing styles in the evolution of Shred.

While it’s a very difficult style to play that requires serious practice, I recommend that every shredder spend at least some time familiarizing themselves with it.

Neoclassical shred guitar continues to evolve both as a playing style and a genre of music and can be utilized as a source for inspiration and virtuosic techniques that can be applied to other styles that you may be more interested in.

The Neoclassical Shred Guitar Masters

So, who are some of the masters of this style? Well, there are plenty of talented neoclassical shred guitarists out there, but a few that come to mind are Yngwie Malmsteen, Jason Becker, Uli Jon Roth, Vinnie Moore and, one of my personal favorites, Dan Mumm.

Let’s take a brief look at the original Neoclassical shredder and one of the more recent top players to see how things can change over the years and how neoclassical can be used in completely different ways.

Since neoclassical is blend of the old and new, let’s take a look at the original (Yngwie will never get old) and new of neoclassical…

Yngwie Malmsteen

Yngwie Malmsteen is a Swedish guitar virtuoso who has been at the forefront of neoclassical shred guitar for decades. His technical ability and speed on the guitar are truly impressive, and he has inspired countless guitarists with his style. He’s considered the father of neoclassical shred guitar. Countless guitarists have been inspired and influenced by the original neoclassical shred virtuoso. 


Dan Mumm

Dan Mumm is one of those countless guitarists who have obviously taken inspiration from Yngwie but he stands out as something of an anomaly.

He’s a neoclassical shred guitarist and multi-instrumentalist composer who has made a name for himself with his covers of popular classical music, his incredible playing, and his ingenious guitar courses. His ability to blend classical and shred elements in a way that is both elegant and entirely original is truly impressive, and his solos always manage to surprise. It’s as if someone gave Beethoven an electric guitar and some LSD and said “go write some metal music.”

Mumm’s relative obscurity might be due to the fact that he seems to forget he’s working in an established genre. I warn you that you’ll be hearing about him a lot in this blog.


Here’s a particularly weird example of Dan Mumm’s strange genius.  The composition is so out of left field that it might take you a couple listens to start to understand it.  Once you do, it will blow your mind:


If you’re interested in learning more about neoclassical shred guitar, there are plenty of resources out there to help you get started. Just remember, it’s not for the faint of heart – this is a style that requires dedication, practice, and a genuine love for music.

So, if you’re ready to take your guitar skills to the next level, give neoclassical shred guitar a try. You might just find that it’s the perfect blend of classical and shred for you.

Shred on!

-Anton Anton


Master Shred with these Shred Guitar Scales

Shred Guitar Scales
Shredding like clockwork

Ahoy there, fellow Shredders! Are you looking to learn to Shred like the masters? Have you ever wondered how the great players achieve their level of skill and knowledge on the guitar? Then pay close attention, because I’m here to point you in the right direction with a practical guide on Shred guitar scales.

First things first: what the heck are guitar scales? Very simply, scales are a series of notes played in a specific order that make up the foundation of a musical piece. They provide the basis for melodies, harmonies, and all sorts of musical goodies. And when it comes to shredding, mastering scales is a crucial step.

While learning guitar scales is a lot easier than it may seem, it still takes some patience and practice. But trust me, it’s worth it. Imagine being able to effortlessly fly up and down the fretboard, impressing everyone with your fancy fingerwork. Sounds pretty darn good, don’t it?

Do Shred Guitar Scales even exist?

You’re likely here looking for some specific Shred guitar scales. Well, that is a common mistake. While there are certain scales that are favored for different genre’s of music, such as the Blues pentatonic scales for Blues and Rock styles and the harmonic and/or melodic minor scales for Neoclassical Shred styles, there really isn’t any such thing as a “Shred guitar scale.”


Shred Guitar Scales
Shred Guitar Scales


While different scales give a different sound and switching between them is a common strategy among the Shred Masters, what makes your playing fit within the style of Shred has a lot more to do with technique and musical context than any specific scale.


Scott Paul Johnson demonstrates how to use the CAGED system for learning all the minor Pentatonic scale positions. 


What to use as Shred Guitar Scales

While there aren’t any specific Shred guitar scales per se, learning the standard pentatonic/minor Blues pentatonic, the minor scale and the Phrygian mode would put you in the ballpark of knowing the “standard Shred guitar scales” as these scales are some of the most common found in Shred guitar. 

The trick is to get comfortable switching between them, but we’re getting ahead of ourselves. While every guitarist faces the temptation of rushing ahead, remember that patience and discipline are two characteristics that all of your favorite Shred legends have in common. Not a single one of them rushed ahead, so don’t you even think about it!

While it might take you some time to get to where you want to be, I promise it will be worth it in the end.


An example of how the Phrygian mode sounds in the context of Shred from a great YouTube guitar channel called NeoGeoFanatic
 

The Modes

Having a solid understanding of the modes is one of the most effective ways to become a Shred master. While learning all of the modes can seem like a daunting task, it’s a lot simpler than it looks if you know how to approach it.

 I’d strongly recommend checking out the course that both introduced me to the modes and allowed me to master them up the entire fretboard. That course is The Infinite Shred Method by one of my favorite Shred masters, Dan Mumm. .

He’s come up with a truly unique way of learning the modes, where you only have to learn simple patterns starting with just 3 patterns of 3 notes that repeat across the fretboard to give you a new perspective of the fretboard and a clear picture of how the mode patterns repeat.

This’ll give you an intuitive understanding of how the modes and the fretboard work, so you can improvise all over the place with ease and come up with infinite patterns of your own.


Here's a great review of Dan Mumm's Infinite Shred Method by Sandesh Balasubrahmanyam


Tips for mastering shred guitar scales

So, without further ado, let’s dive into some tips for mastering some scales to use as shred guitar scales:

  1. Start with the basics. Before you dive into advanced scales, make sure you have a solid foundation in the basic ones. This includes the major and minor scales, as well as the pentatonic scale (which is a fan favorite among guitarists).
  2. Practice! Like I said before, learning scales takes some time. You don’t want to just memorize them but you need to lock them into your muscle memory for them to be useful to you for Shred.  With patience and consistent practice, you’ll get there faster than you’d think. Don’t get discouraged if you’re not a shredding master overnight – it takes time.
  3. Experiment with different fingerings. There are multiple ways to play the same scale, and experimenting with different fingerings can help you find what works best for you. Remember that, while there are certain recommended fingerings for scales when you are learning them, a scale’s fingering will change based on the context of what you’re using it for and doesn’t always stay the same.
  4. Play along with a metronome. This will help you with timing and rhythm, and will also give you a clear way to measure your progress. That way you can set specific speed goals and know for sure when you’ve achieved them. More importantly, starting slowly with a metronome and working your way up ensures that you will learn each scale with clarity and avoid bad habits that lead to sloppy playing. And, as I’ve said before, sloppy playing is the antithesis of Shred!
  5. Mix it up. Don’t just stick to one scale – try out different ones and see which ones you enjoy playing the most. The more variety you have in your practice routine, the better. Once you’ve mastered 2 or more scales, try practicing different ways to combine or link up the different scales.

Improvise over backing tracks

Once you have the scales memorized and internalized, get some backing tracks and start practicing coming up with melodies within the scales that go with the backing track by just playing around within the scale. 

If you’re using a minor scale or minor pentatonic, make sure to find a backing track in minor. If it’s in C minor, you’ll need to use a C minor or C minor pentatonic scale.

When you’ve mastered the modes across the fretboard, you’ll be able to practice improvising while switching between the modes as well as use the modes to connect patterns in different positions. This is how the Shred Masters are able to jump all over the guitar neck while shredding.

Want some killer backing tracks to Shred over? Check out Maxxxwell Carlisle’s epic collection of original backing tracks.


Shred Guitar Scales Metronome or Metropolitan Gnome
A Metropolitan Gnome, also known as a “Metrognome”

Use a metronome!


Transposing scales

Friends, now let me tell you about transposing scales.

You don’t have to memorize a whole new scale for every key you wanna play in. Most scales can be moved around the neck, what we call “movable scale patterns,” because they don’t use open notes. It’s like how you can move barre chords around to get different chords without changing your finger placement.

So if you learn a movable scale pattern in the key of C minor, for example, you can play that same pattern in different spots on the guitar to change the key. We call this “transposing.” It’s simple, all you gotta do is know the root note of the scale, usually the first note, and the name of the new root note you wanna transpose to.

Let’s say you’re playing the C minor scale on the 3rd fret of the 5th string. If you move that pattern up to the 5th fret, it becomes a D minor scale. Move it up to the 7th fret, and it’s an E minor scale.

Once you’ve gotten comfortable improvising over some backing tracks, try finding tracks in different keys and practice transposing your scales to match. And when you’re feeling real confident, try working with tracks that switch between two different keys, and transpose your scales on the fly while you improvise.

So there you have it, folks – a practical guide for mastering scales for Shred Guitar. Remember, it takes time and practice, but with persistence, you’ll be shredding like a pro in no time. 

Shred on!

-Anton Anton

Alternate Picking tips for the aspiring Guitar-Shredding Machine

alternate picking tips - shred machine
A Shred Machine

Greetings, aspiring Shred masters! If you’re reading this, you’re probably interested in becoming a guitar-shredding machine. Well, you’re in luck because I’m here to impart some wisdom on the subject with some AAA grade alternate picking tips.

First things first, let’s define what alternate picking is. Basically, it’s the act of using an up-and-down motion with your pick to play melodies, shred runs or arpeggios. This technique allows you to play faster and more accurately, and it’s a crucial aspect of any Shred guitar solo worth its salt.

Now, before you go running off to practice “No Boundaries” at breakneck speed, there are a few things you’ll need to know. First and foremost, make sure you have a solid foundation. This means having a good grasp on the basics of guitar playing, such as chord progressions, scales, and proper finger placement. Without these building blocks, you’ll be stumbling around like a newborn colt trying to walk on ice.

Check out the legendary shred pioneer in action with this essential MAB collection:


Alternate Picking TIps

So let’s take a look at some alternate picking tips that are going to set you on the path to Shred legend status:

  1. Start slowly: When practicing alternate picking, it’s important to start at a slow tempo and gradually increase the speed as you become more comfortable and accurate. Trying to play too fast too soon can lead to sloppy playing and bad habits. Be patient from the beginning and you’ll save a lot of time and headaches in the long run.
  2. Use a metronome: A metronome is an essential tool for practicing alternate picking because it helps you keep a steady tempo and ensures that you’re playing in time. Start by setting the metronome to a slow tempo and gradually increase it as you become more comfortable.
  3. Practice with a pick: While some guitarists prefer to use their fingers to pick, alternate picking is pretty much impossible without a pick. In all seriousness though, make sure to use a pick that you are comfortable with and use the correct grip and angle when holding your pick to ensure a clean and precise sound.
  4. Focus on accuracy: It’s important to focus on accuracy rather than speed when practicing alternate picking. You’ll never impress MAB with muffled notes and sloppy playing. Watch where your fingers land on the frets to ensure a clear, articulated sound from each note and never try to play faster than you’re current skill level will allow. Sloppy practice leads to sloppy playing and that is not real Shred.
  5. Mix it up: You’re going to need to get comfortable with switching techniques, so make sure to mix up your practice routine by using some legato and other Shred techniques such as finger tapping or sweep picking. This will help keep your playing interesting and keep you from getting bored or frustrated.
  6. Finally, don’t be afraid to experiment and find your own voice on the guitar. While it’s important to learn from and be inspired by other players, the best shredders are the ones who have a unique style and sound. So go out there, grab your guitar, and start shredding like there’s no tomorrow! Just make sure to keep it within the realm of good taste, folks – nobody likes a noodler.


alternate picking tips custom shred guitar with skull and sweep picking

Finally, if you want to take your alternate picking to the ultimate level, you need to learn from the best. Check out Michael Angelo Batio’s indispensable video course series from Doug Marks’ Metal Method.

So there you have it, some pro alternate picking tips. With some dedication and practice, you’ll be tearing up the fretboard in no time.

Just remember to have fun while practicing to avoid burnout and always keep learning. There’s always more to discover on the guitar.

Shred on!

-Anton Anton

Guitar Tapping Technique: An Introduction

guitar tapping technique finger tapping

Ahoy, fellow Shred enthusiast! If you’re looking to add some pizazz to your playing, I’ve got just the thing for you: guitar tapping technique. From EVH to modern Shred masters, guitar tapping technique has cemented itself as a staple of the Shred style. It can be used to play fast and fluid legato runs, create numerous different types of speed effects in your playing and even expand the range of shred runs and sweep arpeggios.

Now, I’ll be the first to admit that this technique can be a bit of a challenge to master. But with a little bit of practice and some helpful tips from yours truly, you’ll be tapping out intricate melodies in no time. So let’s get started!

guitar tapping technique finger tapping technique overcomplicated finger twister
you don’t need to get your fingers tangled to master tapping

What is guitar tapping technique?

First off, let’s define exactly what we mean by “tapping.” Guitar tapping technique is where you use your fretting hand to tap out notes on the neck of the guitar, rather than plucking the strings with a pick or your fingers. In other words, you’re using your fretting hand to basically hammer-on notes on the strings.

It’s a popular technique in rock and metal music, and it’s another form of legato technique but one that allows you to extend the range of anything you’re playing and even play at faster speeds than you could without it. It can also add energy and excitement to your playing.

Tapping is a powerful tool in the arsenal of any self-respecting shredder, and with a bit of practice and dedication, you too can unleash some lightning fast and buttery smooth licks on your unsuspecting audience.

Where do I start?

First things first – get your tapping hand in shape. Guitar tapping technique requires precise finger control and quick reflexes, so it’s important to spend some time building up your hand muscles and coordination. 

The best way to get started is to work on some basic exercises designed purely for the first finger (pointer finger) on your tapping hand (the hand you normally use for picking), while using only open strings. Since you’ve already developed your finger muscles and coordination for fretting with your fretting hand, you can start by putting all your attention on your tapping hand before putting them together. Trust me, this is the way to get started.

And don’t forget to work with a metronome! 

Tapping exercise #1

This practice pattern simply alternates between tapping fret 12 of the 1st string and pulling off to the open 1st string. Focus on getting clean notes and playing in time by starting very slowly and practicing with a metronome. You’ll use the first finger on your tapping hand to tap the 12th fret. Also, don’t forget that your fretting hand is doing nothing in this practice pattern.


guitar tapping technique exercise 1
Remember it should sound clean and fluid

Tapping exercise #2

For the 2nd practice pattern, you’ll see that you’re working with the same idea as the first, only now you’ll be switching strings from the 1st string to the 2nd string, 3rd string and back again. As with all of these practice patterns, use only the first finger of your tapping hand for every tapped note and work slowly with a metronome until it becomes easy for you. Then you can start to gradually increase the speed.

guitar tapping technique 2

Tapping exercise #3

For practice pattern 3, you’re back to playing only on the 1st string but now you are going to change what fret your first finger is tapping each time. Use the duration of the open string ringing out after pulling off to change the position of your tapping hand to prepare yourself for tapping the next fret. While this will seem pretty difficult at first, if you take it slow enough with the metronome, it will be a breeze!

guitar tapping technique 3

Combining the Tapping Hand and Fretting Hand


guitar tapping technique tapping device

Once you’ve got the basics down, it’s time to start incorporating tapping into your playing. Start by learning some simple tapping licks and working your way up to more complex patterns. It’s important to start slow and gradually build up your speed and accuracy – otherwise, you risk turning into a gibbering mess of tangled fingers.


  Beginner tapping exercises from Matt Zerkovich

guitar tapping technique 4 finger tapping

As you progress, don’t be afraid to experiment with different tapping techniques and styles. Whether you’re a fan of Eddie Van Halen’s frenetic tapping runs or Joe Satriani’s smooth legato style, there’s a tapping technique out there for every guitarist. 

So there you have it, fellow shredders – the essential exercises and techniques for mastering the guitar tapping technique. Now go forth and tap your way to glory!


Shred on!

-Anton Anton

Shred Guitar Exercises for the Metal Guitarist

shred guitar exercises
a visual pun

Greetings shred enthusiast! If you’re looking to take your shred skills to the next level, I’ve put together a list of Shred Guitar exercises that are just what you need.

After studying Shred for the last 12 or so years, I’ve taken the courses, I’ve watched the videos, I’ve put the time in and, most importantly, I’ve gotten the results. But you still might be surprised to discover just what I know about how to improve one’s skills on the ol’ electric six string.

While a lot of what it takes to master shred is easier than it looks, it still takes hard work, dedication, and most importantly, the right set of exercises to help you reach your desired Shred status.

Enough preamble already.  Here are my top 9 (that’s right, 9) shred guitar exercises to take your skills to the next level:

Alternate Picking Licks:

  • Begin by positioning your hands in the standard alternate picking position, with your fretting hand on the neck of the guitar and your picking hand hovering over the strings.
  • Start by playing a simple scale or lick using alternate picking, with your picking hand moving back and forth between up and down strokes.
  • Pay attention to the motion of your picking hand and strive for a steady, even motion.
  • Gradually increase the speed of your alternate picking as you become more comfortable with the technique.
  • Practice with a metronome to help improve your timing and speed.
  • As you become more proficient with alternate picking, try incorporating it into more complex licks and patterns.


Here’s a video of some alternate picking licks to get you started –

String Skipping:

  • Begin by positioning your hands in the standard playing position, with your fretting hand on the neck of the guitar and your picking hand hovering over the strings.
  • Start by practicing string skipping with simple patterns, such as alternating between the open 1st and 3rd strings with a metronome.
  • As you become more comfortable with string skipping, try adding in your fretting hand to play more complex patterns and licks.
  • Pay close attention to the accuracy and precision of your finger movements as you skip over strings.
  • Practice with a metronome to help improve your timing and speed.
  • As you become more proficient with string skipping, try incorporating it into your solos and compositions.

Here are some string skipping exercises to try, when you’re ready –


Sweep Picking Arpeggios:

  • Start by practicing simple sweep picking patterns, such as 2 string sweeps.
  • Pay attention to the motion of your picking hand and strive for a smooth, fluid motion as you sweep across the strings.
  • Gradually increase the complexity of your sweep picking patterns by adding in more strings.
  • Practice with a metronome to help improve your timing and speed.
  • As you become more proficient with sweep picking, try incorporating it into your solos and compositions.

Here’s a video of some sweep picking exercises –

Two-Handed Tapping Licks:

  • Start by playing a simple scale or lick using only your fretting hand to tap the notes.
  • Once you feel comfortable with this, try adding in your picking hand to alternate between tapping and picking.
  • As you become more proficient with this technique, try increasing the speed and complexity of the licks you play.
  • It can also be helpful to practice with a metronome to improve your timing and control.


More video exercises for you, now for 2 hand tapping –


Legato Licks:

  • Start by playing a simple scale or lick using only your fretting hand to pluck the strings.
  • Once you feel comfortable with this, try using your picking hand to smoothly transition between notes, rather than plucking each note individually.
  • Practice using both your fretting hand and picking hand to create legato lines.
  • As you become more proficient with this technique, try increasing the speed and complexity of the licks you play.
  • It can also be helpful to use a metronome to improve your timing and control.

shred guitar exercises

Bend and Vibrato:

  • Begin by practicing simple bends with your fretting hand. Start with a single string and gradually work your way up to bending multiple strings at once.
  • Pay attention to the pitch of the bent notes and strive for a smooth, controlled bend.
  • Once you feel comfortable with bends, try incorporating vibrato into your playing. This can be achieved by rapidly rocking your finger back and forth on the bent string.
  • As you become more proficient with these techniques, try combining them in your playing.
  • It can also be helpful to use a metronome to improve your timing and control.


Scales and Modes:

  • Begin by selecting a scale or mode to practice. It can be helpful to start with a simple scale such as the major or minor pentatonic scale.
  • Practice playing the scale in a variety of positions on the neck of the guitar.
  • As you become more comfortable with the scale, try improvising with it over a backing track or chord progression.
  • Experiment with playing the scale in different rhythms and try incorporating it into your own solos and compositions.
  • It can also be helpful to practice with a metronome to improve your timing and control.

Improvisation:

  • Start by familiarizing yourself with the chords and structure of a song or backing track that you want to improvise over.
  • Practice playing scales and licks over the backing track, paying attention to how they fit with the chord progression.
  • Experiment with different approaches to improvisation, such as playing melodically or using a more rhythmic approach.
  • As you become more comfortable with improvising, try adding in elements such as bends, vibrato, and other techniques to add expression to your playing.
  • It can also be helpful to practice with a metronome to improve your timing and control.

Speed and Accuracy:

  • Begin by selecting a simple lick or scale to practice.
  • Slowly work on building up your speed and accuracy by gradually increasing the tempo of the metronome or backing track you are practicing with.
  • Pay close attention to the accuracy of each note and strive for clean, precise playing.
  • As you become more comfortable with the lick or scale, try incorporating it into your own solos and compositions.

So there you have it, folks – my top NINE shred guitar exercises to take your skills to the next level. Remember, practice makes perfect, so don’t be afraid to put in the work and dedication. 

Shred on!

-AntonAnton

Available for Amazon Prime